Thursday, December 31, 2015

Yay or Nay- Nivea Sweet Lips gift set xox


Hiya everyone! So I'm back on blogging now, and I got a brand new camera! This means that my photos will be in better quality and my overall webpage will look cleaner! A few week ago I started a new series of mine called Yay or Nay- which is my reviewing system for products. I haven't done one of these in a while so I thought it was time for another. Today I am reviewing the Nivea 'Sweet Lips' gift set tin, which includes 4 full sized products. Here is what I think of the set!

Products included:
~2x Nivea Lip Butters: Coconut and Vanilla & Macadamia. Creamy and Strongly scented. When I open the tin, the product smells really scrumptious!
~Nivea 'Pearly Shine' Tinted Lip Balm. Gives a shiny, pink finish. Moisturising and shimmery.
~Nivea 'Essential Care' Lip Balm. Very thick, extremely moisturising. Fave lip balm!
Packaging:
This set comes in a pink, hearts gaped metal tin, of which you can remove the label and re- use the tin as something else. I think this is super cute and I will be using this to store different lip products in. This would be a great gift for someone, and the tin would make the present feel really special and unique. Overall I give it a ***** 5 stars for packaging!

Pigmentation:
Now, obviously a lip balm or butter doesn't usually contain any pigmentation, but the 'Pearly Shine' lip balm is tinted. The product gives off a shimmery, subtle pink shade; perfect if your lips need a bit of TLC but you still want a bit of colour on the lips. Overall, because there is only one coloured product, I give the pigmentation *** 3 Stars!

Lasting Power:
In my opinion, I think it is really important for a lip balm/butter to last on the lips. Otherwise, I usually end up applying loads throught the day and using up all of the product! These lip balms give moisture that sinks into the lips, making your lips feel smooth without the thought of anything being there. I usually reapply about twice a day. Overall I give these a **** 4 stars for lasting power!

Finish:
When I wear these, it looks like I am wearing a clear gloss (especially the 'Essential Care'). I like the fact that you can put these on top of a lipstick for a shiny lip look that will not dry out. The 'Pearly Shine' Lip balm looks great on top of a pink lippie! Overall I think that **** 4 Stars is a good score for the finish!

My final opinion of this is that it is a very cute set of full-sized lip products. This would be a great gift for someone who is just starting out in makeup, or a lip balm-hoarder like me! The Nivea 'Sweet Lips' set is a YAY!

Thanks for reading this post, and in the new year I hope to post more for you all! Leave comments down below of anything that you would like to see me write about, but for now I'll see you next time. Lots of love, Gracie xxx

Thursday, December 24, 2015

Just a quick message❤️


Hiya everyone! So I just wanted to wish you all a very Merry Christmas and a Happy New Year! I am sorry that this isn't a full beauty-related post, and that I didn't post yesterday, but I just want to give myself a short break to really enjoy the festive period. Thanks so much for helping me get this blog to where it is, and if you have read even just one of my posts. Next year I hope to be posting better quality posts and hopefully better pictures with a new camera. 
See you soon,
Gracie xxxxx

Thursday, December 17, 2015

Festive Make Up Look! Xxx


Hiya everyone! So I haven't done a tutorial or makeup look in a while, so I thought I would bring you a Christmas-related look! I know this is just a typical look for this time of year, but I thought it was much different to the other looks I have done in the past. You could wear this to a Christmas party, family get-together or even Christmas day itself! I hope you enjoy, let's get right in with it! 


1) Prep the skin, I used my Re-Gen mouisturiser to do so.
2) Using your favourite primer, in my case the L'oreal 'Nude Magique Blurring Primer', apply all over the face. Concentrate this on the T zone, or anywhere that your makeup might slide off.
3) Use a Bb Cream or Foundation with a dewy finish to counteract any winter dryness that this season produces. Then apply a concealer under the eyes and on a my blemishes.
4) I usually do my brows next, so I am using my Revolution eyeshadow pallete to fill them in. After this I brush  the Maybelline 'Brow Drama' through to keep the hairs in place. I also find that this makes the brows look more natural because it makes the hairs more visible.
5) For eyeshadow, I always start with a cream shade all over the lid and up under the brow for a great base. Then apply your silver shadow, for me I used the Flutter Cosmetics single eyeshadow in 'Silver'. Ensure this is blended nicely, and you may also want to intensify the colour more at the lash line.
6) Apply a black pencil liner over the lid and wing it out. Then, using a pencil brush, smudge the liner out and under the eye of you wish. This step is not crucial, but it looks great if you are going for a more party/smokey look.
7) Finish the eyes by curling your lashes and applying 2 coats of mascara.
8) For a highlight, apply a champagne shade to the cheeks, bridge of nose, Cupid's bow and inner corners. This will give you a healthy glow for the Christmas season.
9) Finally, add a red lip to finish the look!


I hope you enjoyed this post, and please leave any suggestions for posts in the comments below! Have a great Christmas, and I'll see you in my next post.
Festive wishes,
Gracie xxx

Thursday, December 10, 2015

Topshop haul! Xxx


Hiya everyone! A few days ago, a friend kindly gave me a few items of clothing that she didn't need and I really liked. So I decided to show you them all today! Also, not all of them are seasonal, but I thought I'd add them all in anyway because why not?! And again, because they were given to me, I cannot say how much they were. So, here is what I got (special notice to my uber-fancy Christmas tree!)


Probably my favourite items of the haul, these are my coats. On the left is a green lightweight, thin coat with leather sleeves. It actually gives more warmth that you would think and it's very seasonal! I love the look of this and I think it's great if you want a coat to take around with you but don't want to carry around a bulky object. On the right is a tan-coloured coat with buttons and a collar. I like this because it looks really smart and put-together, but again is really lightweight like the green one. This would be perfect if you were going out for dinner or going to work.


Next are some dresses, which are mostly for this time of year. In the top left, I have a black pencil dress. It fits really comfortably on me, however it does make my behind look a little large (and no, I'm not just doing a weird pose lol). The top right dress is more of a holiday piece, but I like it because it is really long and flowy. The material is really soft and it fits well on me. Next, the bottom left dress is like a sundress; elasticated at the top and loose at the bottom. Again, this would be perfect for a holiday or just any day out. For the bottom right, I think I am going to wear this for Christmas because of the colours and I just really like it! The top section is comfy and fitted and the bottom fits like a skater skirt. Love it!


These tops are mostly for the summer because they fit over a crop top or vest top. The top left is more of a vest but it is very open so I paired it with this black top. In the top right is a tighter best in a cranberry shade. Colourwise, I think it could be a seasonal wear but it is too short for winter in my opinion. My favourite of the three is the bottom left though, I love the lace and bow, and I think that it goes really well with the top I wore. It's so cute and looks really unique!! In the bottom right are some jumpsuits that didn't fit me but I liked so much that I had to include them. The one on the far left is a black lace strapless one, and the middle on e is the exact same but in a floral pattern. On the far right is a shorter design with straps and a lime green floral pattern.


And finally, I have 2 outfits which I would wear if I was going out to a party or a celebration. The left look is a combination of a pink, wavy-edged vest and a floral kimono. I think this looks really feminine and girly, and I love it! Kimonos make a great finishing touch to any look and I highly suggest you get one! On the right is a one-sleeve pleated top, made of a flowy, thin material. This would be perfect for a disco or night out and I think it looks really sophisticated! Cute!

Thanks so much for reading this post, I spent a really long time this week making this! Please leave me comments below on what you would like to see next, and I hope you have a nice day lovelies!
Gracie xxx


Thursday, December 03, 2015

Yay or Nay Limited Collection Nail Polish Set xx


Hiya everyone! So since that I do a lot of product reviews, I decided to create a review-ing system to make it a little more interesting! I am going to call it a YAY/NAY and that will decide my original decision on the product. I will also give it a rating out of five stars and use these categories:
*Packaging
*Pigmentation
*Lasting power
*Finish
I hope you enjoy this, and here is my first Yay or Nay!


In the Black Friday sale this week, I received a nail polish set from Marks And Spencer (sub brand 'Limited Edition'). I believe it was £10 but I bought it for £5. It comes with 8 lovely shades, 7 sparkly and one matte. 
Firstly, the packaging is really pretty and I like the gold and pink stripes. It would have been better if you could take the polishes out without having to remove the whole packaging. I would rate the packaging **** 4 Stars.

I chose to apply the shade 'Pink Sorbet', which looked like a rose-gold colour. With a single coat, the colour wasn't the most opaque. However, when I applied the second coat it covered better and looked more opaque. The final colour was very sparkly and a gorgeous metallic pink colour. Overall I give the pigmentation *** 3 and a half Stars and the finish ***** 5 stars. 

The lasting power of the polishes was good but not amazing. I got about 3 days before it started to chip, but then I repainted the chip and the polish didn't chip. Overall, I give the lasting power **** 4 Stars.

Overall, I think this set is a beautiful Christmassy collection and would make a great gift. The polishes aren't the most excellent pigmentation of all time but I still really like them and think you should pick one up. So overall, this set is a YAY!!

Thanks for reading, and I hope that you enjoyed this review. Please give me any suggestions on what you would like to see next, but for now that's it for this week.
See you soon, Gracie xxx


Thursday, November 26, 2015

Ideas for Beauty Blog Posts! Xox


Hiya everyone! The other day I was brainstorming ideas for new blog posts and I stumbled upon a writers block. I usually find most of my inspiration from different bloggers, but sometimes the ideas get old as everyone uses them. Also, November is a hard month to write in because there is no big event happening to theme posts around. So here I decided to give you some ideas from when you struggle with this too!

Ideas For Your  Blog:

FOTD (Face Of The Day), Hauls, Reviews, Collaborations, Makeup Collection and Storage, New Releases, Comparisons of Products, Tutorials, Get The Looks, First Impressions, Day To Night Look, Favorite Brand, Bargain Buys, Empties, 5 Minute Makeup Look, Tips, Holy Grails, Makeup Look under £20, Essentials, Season-Based Looks, Giveaways, Best and Worst, Products Worth/Not Worth The Hype and Tags.

Hope that you find this list helpful and leave a comment if I forgot any! Also, do you think it is to early for Christmas posts? When would you like to see them? Let me know in the comments section below.
See you soon/
Gracie
   XXX    

Thursday, November 19, 2015

Chanel Lipstick and Mascara Review xx


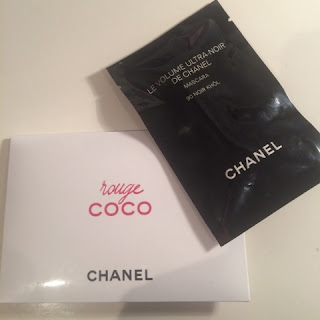
Hiya everyone! So recently I received some testers of the Chanel 'Rouge Coco' lipsticks and the 'Le Volume Ultra-Noir De Chanel' mascara. This is going to be a review, meaning I will tell you what I think and whether I would buy the real product or not. I wanted to test them to see if I wanted the real thing, and here is what I think of them! 


Rouge Coco Lipsticks:


Firstly, let's just talk about the packaging! Beautiful! When I first opened these, I thought that you wouldn't get much product in the package. But after an application, I realised that a little goes a long way. I used the shade 'Roussy', which was a pretty baby pink shade. The lasting power was good, it lasted a little while but then left a slight tint to the lips. I really want to try 'Emilienne' for a cute fall colour! Also, I found the tiny little brush really handy for application of the product. Overall, I like these but I don't know if I would pay the price for them since the lasting power was not amazing.


Chanel 'Le Volume Ultra Noir De Chanel' mascara:

I find that normally all tester mascaras are the same, but this one was very unique. The brush was thick and had tiny little bristles, which I really liked. I curled my eyelashes and applied a single coat and achieved a fluttery, natural look. Normally, I like my lashes to look long and separated, but this mascara tops them all! My lashes look so long yet so natural and I love it! On top of this, it holds a curl all day and I didn't really need to use a curler! The formula is thin and wet, meaning there is no clumps and the product coats every lash easily. Overall, I would definitely recommend this to all lovers of a fluttery lash like me, but if you prefer a more full, thick lash then maybe this isn't for you.


Thanks for reading! I hope you enjoyed this post and I would like to write about more high-end makeup products soon! Please let me know if you have any feedback or suggestions on my blog because I'd really appreciate it! Have a great day, Gracie xox


Thursday, November 12, 2015

Guide To A Natural School Look! xox


Hiya Everyone! So I found it a lot easier to post on Thursday mornings and I think that you lot might find it easier too! Some of my most popular posts have been along the lines of guides and tutorials so I thought that I would write another for you. There is a drugstore look that I have been doing for school recently, and I think that it is a staple school look for me! This is what I do, hope you enjoy!


Products Used:

*L'Oreal Nude Magique Blur Cream
*Nivea moisturising Day Cream

*Maybelline All in One BB Cream

*Rimmel Match Perfection 2in1 Concealer and Highlighter

*L'Oreal Nude Magique powder

*Revolution Eyeshadow Pallete

*Maybelline Brow Drama in 'Medium Brown'

*H&M Liquid Liner (I normally use another liner but it had run out)

*KIKO Volumeyes + Mascara

*MAC 'CremeSheen' lipstick in 'Crosswires'


Guide:


*Firstly, cleanse and moisturise your skin ready for the makeup.

*Then apply the Blur Cream to your forehead, nose, and any other place if necessary. I use this as a primer as well as a Blur Cream because it really helps to keep all my makeup on all day.

*Now apply your BB Cream. I don't always use this, but I find that my blemishes prefer it if I use a BB cream rather than concealer to cover them. I use two different products because the Nivea one is too heavy duty on its own, but the Maybelline one has less coverage and a glowy finish. I apply this with a makeup sponge.

 *Using a small amount of product, conceal under your eyes and bring up to the tearduct area. Since this product has highlighting qualities, I apply this to my brow bone, nose and cupids bow too. I also apply this with a makeup sponge.

*Now powder your forehead, nose and under the eyes. Since you might be at school and having lots of late nights, you may have bigger dark circles under your eyes. If so, this powder is great for this because it has high coverage and leaves a velvet like finish.

*After this, take a medium brown shade from the Revolution palette and fill in my eyebrows lightly. Then brush through them with a brown gel to ensure that they stay put all day.

*Still using the eyeshadow palette, take a light shade to highlight the brow bone and inner corners. Using a light hand, take a dark brown or taupe shade in the crease and a medium brown under the eye.

*This is totally optional, but you can take a thin line of black liner over your upper lash line to make your eyes took more open (and make it look like you got enough sleep!)

*Finally, take a peachy-coral lippie and apply!


Thanks for reading my posts, I love you all v much! Have a great day!

G

XXX


Saturday, November 07, 2015

Beauty Get-To-Know-Me Tag x


Hiya everyone! I was thinking, maybe you guys don't know that much about me, so why not do a tag?? Haha. Anyways, I saw a few people do this tag, so I can't give credits to a specific blog. And I can't believe that I have only done one tag on this blog, they are one of my fave posts to write! (I know that sounds really self-centred, lol.) Here is my answers!

1) Is your hair naturally curly or straight?
My hair is very straight and very thick. This is an advantage in some ways, but still hard to maintain. Usually, I wear my hair down, but otherwise I normally put it in a half-up do.

2) Do you dye it yourself or go to a salon?
I don't dye my hair. Although, I really want to dye it a maroon/reddy-brown shade. Maybe I will at some point. But I do get my hair cut at a salon, though.

3) Do you wear the same style everyday, or do you change it?
I am always changing my hair because I find it really fun to discover new, pretty looks. I mostly like it when the top half of my hair is away from my face, but the bottom half flowing and (sometimes) curled.

4) Do you do your own mani/pedi or get it done in a salon? 
Usually, I paint them myself, but it is always nice to have them done by someone wakes every once in a while. I don't really wear false nails that much though, I can never keep them on!

5) How often do you change your nail polish?
Probably about once a week. I chip my nails really easily so they need constant painting!

6) How long does it take to put makeup on in the morning?
I can put it on quite quickly, but where's the fun in that? I like to take my time with my makeup because I find it really calming and fun. Every day I do a new look and experiment with products, so that takes up quite a lot of time. Overall, I'd like to say I take about 35-40 minutes.

7) What do you do first? Face or eyes?
I do my face first. I don't know why but I always do my makeup in a specific order, I guess I'm just used to it. First is base makeup, then brows, then eyes, then cheeks, then lips.

8) Do you collect makeup or just buy it when you need it?
Both! When u run out of a product, I will repurchase it, but along the way I will pick up a bunch of other bits that I really don't need!

9) What time do you go to sleep and wake up? 
I go to bed between 10-11 and wake up at 6:30. Yeah, I have a weird sleep schedule, but I like waking up early sometimes!

10) How tall are you?
Between 5"5 and 5"6.

11) Do you have any pets?
I have a jet black cat called Midnight, which I love to bits.

12) What is your fave colour?
Red!

13) How did you come up with your blog name? 
Well, to start, my name is Gracie. For the second part, I just rewrote it over and over until I found a cute name that flowed! I love my blog name, I think it is really pretty and makes my page sound interesting :)

14) Do you always wear a full face of makeup?
Most of the time. Not because I feel like I have to, though. I just love doing my makeup every morning, and trying lots of different bits and bobs to create a look!

15) What are you doing with the rest of your day?
Lying on my bed with snacks and Netfilx!! Haha xox

I hope you enjoyed this (really long) tag and learned something new about me! I tag everyone who is reading this to do it! See you soon,
G
Xxx


Thursday, November 05, 2015

Primark Homeware Rave!! Xx


Hiya everyone! So I know it is not a Wednesday (sorry about that) but I wanted to post at a different time to see when you guys are most active. Recently, I have been absolutely LOVING the Primark homeware range, so I thought that maybe you might be interested to hear about it. I know that I talk about Primark/Drugstore products a lot, but basically I just don't always feel the need to buy expensive products all the time when I can find the same things for less. And I am still quite young compared to other YouTubers, so I don't need lots of expensive products. I'm not saying that high-end products aren't good though, every now and then I like to treat myself to a new lipstick or mascara! Anyways, here's some pretty room décor!


All of these were very low priced and great quality. These decorations have completely revamped my room, and I love the cute quotes that they contain. Currently, I am in the process of redecorating my room, so these have really helped my room to look fab!
See you soon,
G
Xx


Friday, October 30, 2015

Minnie Mouse Halloween Get the Look!


Hiya everyone! Happy Halloween!! This year I decided to go as Minnie Mouse, and I thought you would like to see how I created this look! I know that you probably have already done your costumes, but I wanted to post this anyway! So enjoy!

Outfit:


The key to the outfit is polka dots. I wore a red spotty shirt and black spotty skirt, along with mouse ears, red bow and gloves.

Make-Up Look:


I know not everyone wants to be scary on Halloween, but I just added lots of black to the typical Minnie look. Here I used a red and blue eyeshadow mixed to create bruises under my eyes, then used a face tattoo underneath. I took this shadow right into my tearduct area and blended roughly. Then I pressed black eyeshadow on my lid and smudged with a dense shadow brush. For my lips, I blotted out the corners and applied red lip pie to the centre. Then using a lip brush, I created big, false Minnie lips with shine. And not forgetting the nose! I just used a thick L'Oreal Super Liner for this. Finally, I put on some Minnie ears and black gloves to complete the look!

Thanks for reading and I hope you have a scarily good Halloween! Make sure to eat lots of sweets and have great fun! See you soon,
G
Xox


Wednesday, October 28, 2015

Fashion and Homeware Haul!


Hiya everyone! So the other day, I went into town and bought a few things (mostly Primark items) so I decided to share them with you today. Also, I may or may not be writing a Halloween post, so keep your eyes peeled for that! So here is my shopping picks!

Primark grey throw:
I bought this for the end of my bed, and it is literally the softest thing EVER! I believe Gabby (VelvetGhost) talked about this in one of her vlogs, so if you have seen that then you will know what I mean. This is great for lounging and looks really chic in any room. If I saw this in someone else's home, I would definitely assume it was more money than Primark prices! I would definitely recommend you go and check it out for yourself next time you are in store!


Jasmine Reed Diffuser from Primark:
Don't get me wrong, I do love candles in Autumn, but I wanted to try something else. I heard that diffusers give off stronger scents and last longer than candles, so I wanted to see what the deals was. This scent is really floral and calming, perfect for a bedroom. However, I have not tested this out enough to give a verdict, but so far I like it! 

Decorative Plaque from Primark:
Recently I have been looking for cute little decorative things to put on my bookshelf. I liked this because of the quote and colours, they fit perfectly into my pastel/grey room. Right now, this is standing next to my diffuser and the colours really compliment each other.

Pyjamas from Primark:
I really needed some new pjs, and I picked these up because they are seasonal yet totally me. The gold letters say '#LetsSleepIn' and the t-shirt is maroon. In case you couldn't see, the bottoms are cream and floral. Primark's pyjamas are so comfy, I bet that everyone has tried some at some point, haha.

Leggings from Primark:
I don't know about you, but all of my leggings get ruined really easily and I go through them like water. It was about time I got some new ones, and I really liked these reddish brown pair. This particular colour seems to be really in fashion right now, but the patterns on these are really different. All leggings from Primark are really soft, but you can get many different types of fit and material.

Thanks for listening to my haul, and look out for my Halloween post coming very soon!! Please comment posts I should do, I love to recieve feedback from you lovely lot!
See you soon,
G
Xxx


Wednesday, October 21, 2015

Skincare favess xox


Hiya everyone! So today I thought that I would talk about my skincare must-haves, since I haven't really talked about skincare before. Firstly, I have combination to dry skin. My forehead is quite oily and prone to spots, but everywhere else is pretty dry. I use the same skincare products all of the time, because I am happy with my routine and I don't want to upset my skin. Please let me know if you have used any of these before, I would be very interested to know. Here are my picks!
Garnier Mycellar Water cleanser for Sensitive skin:
I love using this because it is so quick and easy for mornings and evenings. A little amount goes a long way with this product, which means it lasts ages. Because the mycellar water is for sensitive skin, it is really gentle and leaves your skin feeling super smooth, soft and rejuvenated. Also, this is very budget-friendly because it is around £4-£5. Highly reccomend!

St Ives Apricot blemish control Scrub:
I don't believe I have heard anyone ever talk about this before, but I love it! Since I have dry skin but also spots, this is great because it helps remove dry patches and clear blemishes. The St Ives scrub is quite strong, so any impurities on your skin will be cleaned away. I use this in the shower 4-5 times a week and I always feel really clean and fresh when I have finished. Go check it out if you are looking for a new face scrub!

Montange and Jenessee face mask in Blemish Mask:
I don't often repurchase a face mask from this range, since there is such a variety of scents and purposes. I use the Blemish mud quite a lot, even though it is quite basic. With each package I get 2-3 uses, and for the price, that's an incredible value for money. These are really fun to do with your friends too, and perfect for sleepovers.

Re-Gen Cream:
This is my daily moisturiser, and it is perfect for me because it is designed for blemishes and dry skin. Ever since I have been using this, I have noticed dramatic changes in my skin, this clears all of my imperfections and deeply moisturises dry skin. Also, underneath my makeup, this gives me the most beautiful glow that makes my skin look really healthy. This is probably the best moisturiser I have ever used and I would highly reccomend you buy one!

Those were my fave skincare products, I hope you enjoyed reading. Please give me suggestions on posts I should do next, I would love some of your feedback! 
See you soon,
Gracie
Xxxx


Monday, October 19, 2015

Cute Heart Cookies!


Hiya everyone! So today I thought I would do something different and show you how to make some really delicious heart shaped cookies! I know this is pretty basic stuff, but since it is my first baking post I thought why not? Please feel free to let me know if I should do more of these baking posts, but this is the method I use!


You will need:
225g Butter
350g Plain white flour
175g Caster sugar
175g Brown sugar
1 tsp Vanilla extract 
1tsp Salt
1tsp Baking powder
2 Eggs
Heart cutter (or any cutter you have) 
Greasing paper/ egg brush
Bowls
Rolling pin
Scales

**Side note, this recipe makes quite a lot of cookies, so you can half the mixture if needed**

Method:
1) Preheat the oven to 190 degrees Celsius.
2) Mix the flour, baking powder and salt.
3) In another bowl, mix the sugar, vanilla extract and butter. Then beat in the eggs.
4) Gradually beat in the mixture from the other bowl. Then knead until you have something like this...

5) Split the dough into two halves and roll out until flat. Wrap the dough you are not using in cling film and put it in the fridge whilst you wait.
6) Using an egg brush or greasing paper, spread butter over your pan. Then cut hearts (or any other shape) out of the dough and align on the pan.


7) Bake for 9-11 minutes and enjoy!

Thank you for reading this post, and I hope you enjoy making these! Please give me suggestions on what I should write about next, but for now I'll see you soon!
G
XXX